Note
Optional (but fun) content
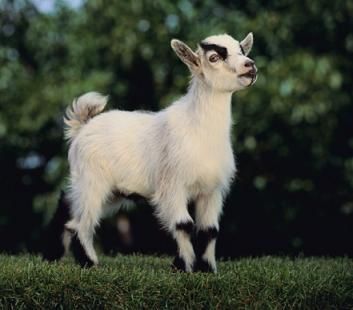
This page shows you a goat. Click on it. Easy, right?
How does it work?
Opacity
There's a CSS property called opacity. It ranges from 0 to 1. Something with an opacity of 0 is fully transparent. An image with opacity of 1 is fully visible. A value 0f 0.2 is mostly transparent. Here's an image with opacities of 1 and 0.2:
Here's my CSS:
- .hiding {
- opacity: 0;
- }
- .shown {
- opacity: 1;
- }
Give something the hiding class, and it should be invisible. shown, and it should be, er, shown.
Events
Now I want to tell the browser:
- When the mouse cursor goes over the image, use the
hidingclass. - When it leaves the image, use the class
shown.
I can use a little JavaScript for that. JavaScript is a programming language that runs inside browsers.
Check this out:
- <img src="goat.jpg" alt="Goat friend" onmouseover="alert('Goats rock!')">
onmouseover is called an event. It has code that runs when the mouse cursor enters an element (image, heading, whatevs). alert shows a message on the screen. So, when you move the mouse cursor over the image, the message "Goats rock!" should show on the screen.
Try it:
Check out onmouseover="alert('Goats rock!')". For onmouseover, you give the code in quotes. For alert, you put the message in quotes.
When you put alert inside onmouseover, you have quotes inside quotes. Use different types of quotes to stop the browser getting confused. I used " for the outer quotes, and ' for the inner. But it doesn't matter which way they go. I could have done:
onmouseover='alert("Goats rock!")'
The opposite of onmouseover is onmouseout. Its code runs when the mouse cursor leaves the image.
Put it together
OK, so you know how to run some code when the mouse cursor goes over an element, like an image. You also know about opacity in CSS.
Here's the CSS again:
- .hiding {
- opacity: 0;
- }
- .shown {
- opacity: 1;
- }
I want to tell the browser:
- When the mouse cursor goes over the image, use the
hidingclass. I put the code for that inonmouseover. - When it leaves the image, use the class
shown. I put the code for that inonmouseout.
How do you change an element's class in code? Here's an example:
- onmouseover="document.getElementById('goato').className='hiding'"
Let's break it down:
documentis the page.getElementByIdsays to find an element on the page with the givenid.classNameis the class of that element.=means take what is on the right (the wordhiding), and put it on the left (the class attribute of the element with anidofgoato).
Translation: when the mouse cursor goes over the image, give it the hiding class. The image goes fully transparent.
Here's what happens when the mouse leaves the image:
- onmouseout="document.getElementById('goato').className='shown'"
Almost the same.
Here's the whole thing:
- <img id="goato" src="goat.jpg" alt="Goat friend"
- onmouseover="document.getElementById('goato').className='hiding'"
- onmouseout="document.getElementById('goato').className='shown'"
- >
I gave the image an id, so I could tell the code what element to change.
Lots you can do
You can do a lot with switch-classes-when-something-happens code. Make an image bigger or smaller. Give it a border. Change how text looks.
You can have code attached to one element affect another, by changing ids. For example:
- <img src="goat.jpg" alt="Goat friend"
- onmouseover="document.getElementById('doggo').className='hiding'"
- onmouseout="document.getElementById('doggo').className='shown'"
- >
Moving the mouse cursor over the goat will change the dog, if it has an id of doggo.
Mess around. Much fun to be had.